I have done very little digital scrapbooking so I thought I would have a go by combining a doodle heart I did today and by using the collage background I did the other day. Think it's about time I started scanning and saving scrapbooking images. I had a lot of fun doing this.
Sunday, 29 January 2012
Friday, 27 January 2012
Photo Art Friday
Time to participate in Photo Art Friday again. The challenge this week was to use 3 photos and the supplied texture.
The photos were of my favourite birds, the turaco. So I used 3 pictures of the birds, cutting out 2 pictures of the birds, putting them on a plain layer and then applying the photocopy filter with black and white. The detail option was low so that it was like a faint drawing. I blended this layer with the soft light blend. I then applied the texture, removing some of it with a mask so that the main turaco's head was clear:
The photos were of my favourite birds, the turaco. So I used 3 pictures of the birds, cutting out 2 pictures of the birds, putting them on a plain layer and then applying the photocopy filter with black and white. The detail option was low so that it was like a faint drawing. I blended this layer with the soft light blend. I then applied the texture, removing some of it with a mask so that the main turaco's head was clear:
Thursday, 26 January 2012
Collage / Journal Background in Photoshop Elements
I've watched lots of videos showing artists creating journal pages with gesso, paint, stencils, stamps and wondered whether I could do a serendipity journal background in Photoshop Elements using photos so I had a go and I was rather pleased with the result. The good thing is that I can just change the colour scheme by adjusting the Hue and Saturation.
So here is my attempt:
And to show you how I did it, here is the speeded up video. To see full-size, hover over the video and click on Vimeo and when in Vimeo hover over the video and click the full screen icon.

So here is my attempt:
And to show you how I did it, here is the speeded up video. To see full-size, hover over the video and click on Vimeo and when in Vimeo hover over the video and click the full screen icon.

Sunday, 22 January 2012
More Butterflies
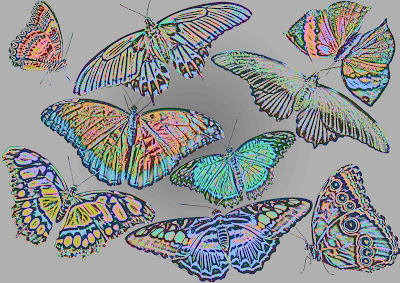
I haven't been able to get away from playing with the beautiful butterflies my hubby and I took at Wisley. Here is a picture of all the butterflies we took and here is some experimentation.
And this last example is a pattern designed from the wings of a butterfly:
And this last example is a pattern designed from the wings of a butterfly:
Wednesday, 18 January 2012
Odosketch ... awesome
It's time to get back to doing some serious doodling. For me one of the best things about photo editing is that you can combine both photos, drawings and doodles and so often these make the best photo art.
So I have been trawling the net to get inspiration and I came across an amazing site called Odosketch.
What is special about Odosketch is that you can playback the drawings that everybody else created as well as sketch pictures yourself online. So many talented people out there.

So I have been trawling the net to get inspiration and I came across an amazing site called Odosketch.
What is special about Odosketch is that you can playback the drawings that everybody else created as well as sketch pictures yourself online. So many talented people out there.

Tuesday, 17 January 2012
More Butterflies..... using Brushes
I took another one of my butterflies and made it into 3 different brushes. I then layered the brushes one on top of the other. I used the wing of the butterfly as a background and this is what I finally came up with:
Sunday, 15 January 2012
Butterflies at Royal Wisley
Went to Royal Wisley Gardens today to see the exotic butterflies they have at the Glasshouse. The collection is there until the 26th February and it was a wonderful opportunity to take some pics of them. I shall definitely be going again during the week sometime when it is a bit quieter but still got some stunning pictures. Here is one that I have been playing with already:
Thursday, 12 January 2012
Phone Bag Complete
I've completed my 'phone bag' and I'm pretty pleased with it:
I learnt quite a lot from making it and here are some tips that might be useful if you want to make one:
I learnt quite a lot from making it and here are some tips that might be useful if you want to make one:
- If you want to make it double-sided make sure that the fabric is thin. The fabric I used here was too thick and I wouldn't bother to turn it the other way round - too much hassle.
- I used little stick on velcro circles on the inside to secure the top which also makes it one-sided but very convenient. Whether they will fall off remains to be seen! Maybe worth sewing them on before you attach the inside and outside.
- Also, next time I think I would put the right sides together of the outside and inside, sew all the way around with the loops in place, leaving a small gap, turn it right-side out and then just sew up the sides close to the edge. Trying to sew around the narrow top was very fiddly when I tried to put the inside and outside together.
Wednesday, 11 January 2012
Using the same textured background for 3 different effects
I love birds as do so many fabric artists and crafting people it seems. I put together a new textured background and added these birds to it. It's surprising how different each one looks:
Tuesday, 10 January 2012
Phone Cover / Bag: Printing and Sewing Fabric
I was given a new phone for Christmas and wanted to create my own cover. I also wanted to create a little bag that I could hang down from my neck to contain my phone (and later realised that if I made it big enough I could use it for glasses as well).
I have finally loaded the latest version of Photoshop Elements on a Windows 7 operating system and, boy, did I have trouble printing the fabric. I gave up trying to print a custom size and chose an existing print size. The size that worked well for what I wanted was the US legal size 8.5 by 14. This was the exact size I needed (I printed it without borders so that it took up the entire 8.5 by 14 although I cut my fabric slightly larger than this). If I cut it down the middle lengthwise, the one half was perfect for the outside and the other half the inside fabric.
So I took the outside piece and put a piece of thin batting under it. I then quilted the outside piece and lined it with the inside piece. Here are some of my fabric prints and some of my samples. I haven't finished my final 'phone bag' yet so these ones are shorter and are not big enough to hold my glasses. Also I decided for my final version not to have a flap but a piece of velcro on the inside. The button takes too long to open and a flap means using some of the length or printing out more fabric.
All the fabrics were designed in Photoshop Elements and printed on my Epson pigment printer (you can see I have quilted the strip on the right):
Sunday, 1 January 2012
Subscribe to:
Comments (Atom)


