

Showing posts with label Stencils. Show all posts
Showing posts with label Stencils. Show all posts
Thursday, 18 August 2011
SVG Dog Stencil
I got such an amazing response to my puzzle I thought I would upload my svg dog stencil. So to download this stencil go here. To read about how I created it go here. I added a little shiny spot to the nose which you can't see here.


Wednesday, 27 July 2011
Fabric Painting with a Stencil
I dug through my stash of fabric which had a wash of fabric paint and found one to experiment with. A wash of Pebeo Setacolor fabric paints had been applied using a sponge. So using the stencil created in my previous blog, I cut out the stencil on freezer paper using the Cricut machine. I then ironed the freezer paper onto the fabric and applied some blue paint. This is the result:
Gee, I'm really quite pleased with that. The beauty about going through all the hassle of converting the picture to use on my Cricut is that I can cut it out as many times as I want. The freezer paper can only really be used once for this.
Monday, 25 July 2011
Creating a Stencil

The easiest way of making a stencil using a black and white image like the above (see previous post) is by putting it under a piece of acetate and drawing the outlines with a black permanent pen, making sure there are no areas of detached white (like the nose here). Then cut out the black areas with a craft/Xacto knife and you are good to go...
But, oh noooo, Miss Gadget Girl here has to go the long technical route. About a year ago I bought myself a Cricut which is used mainly for card making. However, I saw the potential for making complicated stencils for fabric painting.

So, to be able to use the picture I have here with my Cricut machine, I have to convert it to a vector type image. Photographs which can be viewed and manipulated in Photoshop Elements are made up of lots of pixels (bitmap) as you see here in this enlarged view:
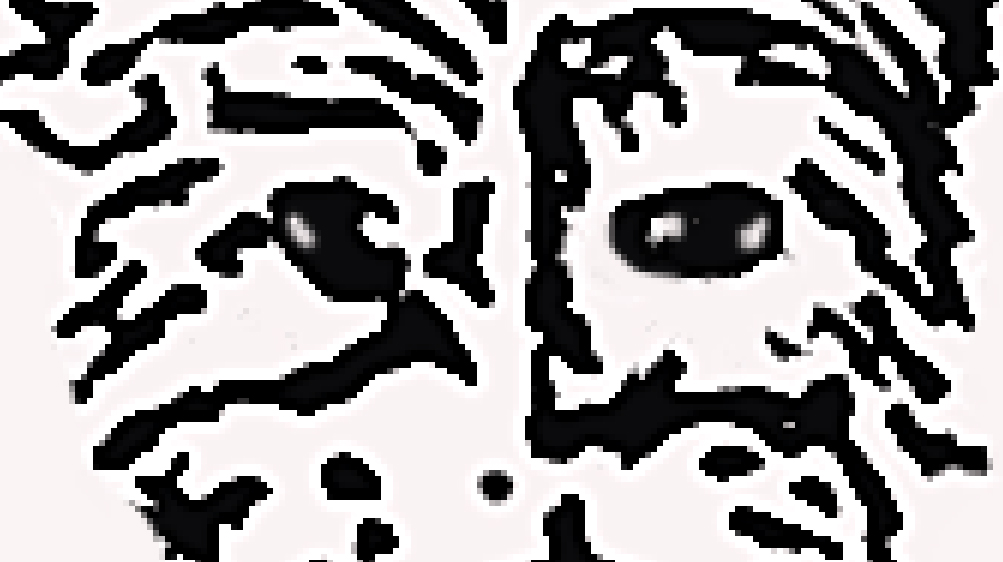
A vector type image or graphic is made up of lines, points and curves and includes mathematical equations to calculate the shapes. The advantage of a vector graphic is that you can increase or decrease the size of the graphic without losing any quality whereas you can see above that the more you enlarge a pixelated image the more it loses its smoothness.
To work with vector images you need a completely different software package (the main Photoshop package can deal with vectors but not Photoshop Elements). So to create vector images for my Cricut, I have 2 software packages, Craft Edge's Sure Cuts A Lot which enables you to use your own graphics with the Cricut and Inkscape which is a wonderful free graphics package.
I open Sure Cuts A Lot (SCAL) and use the trace option to import the image. This converts the image from a bitmap to a vector. Once this is done the image can be cut immediately but sometimes, if it is a complex image, it requires a fair bit of editing to make it cut a smoother stencil. To minimise editing it is sometimes worth printing out the image and smoothing the edges and cleaning it up with a black ink pen and then scanning it back in.

Although you can edit these images in SCAL, the editing tools are quite basic and I find them quite frustrating so I now take the image into Inkscape and clean it up there. I have to say that if you have never used vector graphics before there is a fair bit to learn and if you are not good on the technical side I suggest sticking with the xacto knife!
Here is a close up of the dog's nose showing the vector points which you can move. When you click on a point you are able to change the curve by manipulating the little 'arms' (see top left of nose). When the image is first traced there are lots of vector points. It is worth deleting some points because the cutter will move to each vector point which makes the cutting less smooth if there are many points:

Here is the image in SCAL after it has been cleaned up:

The vector images that can be used with the Cricut are SVG images (scalable vector graphics) and there are lots of free SVG images on the internet that you can use with the Cricut (if you have SCAL). You don't have to make your own if you don't want to.
In the next post I hope to show you the dog face painted onto fabric.
Sunday, 24 July 2011
Converting Photographs to Black and White
One of the most useful techniques you can learn in Photoshop Elements is how to convert a picture to black and white (without grey) and use it to make stamps, stencils and templates for thermofax screenprints.
The problem is there are a zillion ways of converting a picture to a black and white image to use for these purposes and the method you use depends on the photograph. Sometimes a photograph really doesn't have enough contrast to do a good job of conversion and often it is necessary to 'cut-out' the object in the photograph and then change it.
One weekend I took this picture of a lovely little dog at a pub that my friends and I went to. I struggled to get a close up of the dog and the contrast wasn't good at all but I really wanted to see if I could make a stencil of the dog's face.

So the first thing I did was to crop the picture to show mainly his face. I then applied an auto contrast and an auto sharpen to try and improve the contrast.

I then tried all the usual simple methods of converting a picture to black and white. Make sure the foreground colour is set to black and the background colour is set to white. Then go to Filter > Filter Gallery. Go to the sketch options and try out the Stamp, Photocopy, Torn Edges and Note Paper options. Make sure that you fiddle around with the settings on the right-hand side (eg light/dark balance, smoothness, detail etc).
However, none of them gave me the detail I wanted so I went in search of a different method. I went to the artistic section and chose poster edges. After playing around with Thickness and Intensity I got more lines and started to see the outline of a decent stencil.

I then converted the picture to black and white by going to Enhance > Convert to Black and White.

There are still areas of grey so to get rid of these I use the Background eraser tool, set the brush to it's largest and the tolerance level to about 10% and click on areas of grey to remove them. There are still bits left so I get rid of these using the eraser tool. Finally I remove areas around the head using the eraser tool and change some of the lines the way I want them.
And now the little dog is ready to turn into a stencil which I will do in the next post...
The problem is there are a zillion ways of converting a picture to a black and white image to use for these purposes and the method you use depends on the photograph. Sometimes a photograph really doesn't have enough contrast to do a good job of conversion and often it is necessary to 'cut-out' the object in the photograph and then change it.
One weekend I took this picture of a lovely little dog at a pub that my friends and I went to. I struggled to get a close up of the dog and the contrast wasn't good at all but I really wanted to see if I could make a stencil of the dog's face.

So the first thing I did was to crop the picture to show mainly his face. I then applied an auto contrast and an auto sharpen to try and improve the contrast.

I then tried all the usual simple methods of converting a picture to black and white. Make sure the foreground colour is set to black and the background colour is set to white. Then go to Filter > Filter Gallery. Go to the sketch options and try out the Stamp, Photocopy, Torn Edges and Note Paper options. Make sure that you fiddle around with the settings on the right-hand side (eg light/dark balance, smoothness, detail etc).
However, none of them gave me the detail I wanted so I went in search of a different method. I went to the artistic section and chose poster edges. After playing around with Thickness and Intensity I got more lines and started to see the outline of a decent stencil.

I then converted the picture to black and white by going to Enhance > Convert to Black and White.

There are still areas of grey so to get rid of these I use the Background eraser tool, set the brush to it's largest and the tolerance level to about 10% and click on areas of grey to remove them. There are still bits left so I get rid of these using the eraser tool. Finally I remove areas around the head using the eraser tool and change some of the lines the way I want them.
Subscribe to:
Posts (Atom)