Pages - Menu

Showing posts with label Snapseed. Show all posts

Saturday, 25 April 2015

Day 115 of 365 Day Challenge

I am absolutely loving the new Snapseed app release.

When I first opened it I was a bit dismayed because I had got used to the original setup and it felt different and not so easy to use but it has been surprising how quickly I adapted to it. In terms of cleaning up photos, I don't believe anything beats it now. On the way to get groceries today, I saw loads of bees hovering around some lilies. Just the perfect photo opportunity. When I got home it was straight into Snapseed and voila, I have my photo for the day. No other app needed.

Friday, 24 April 2015

Day 114 of 365 Day Challenge

Have you ever walked out of a cafe and forgotten to pay? Well, it happened to me today and it is always something you dread.

I went to this wonderful little French cafe called, Cafe Lavande, which is towards the top of the Mid-Levels escalator at 4A Prince's Terrace. The cakes look absolutely delicious but I settled for a lovely cup of blossoming Chinese flower tea. The flower is in a ball and it slowly opens, releasing it's fragance and becomes this pretty submerged flower.

Anyhow, I had ordered the tea at the counter and because I had paid up front all day I had it in my head later on that I had paid. I sat for ages taking pictures of my cup of tea and finally left thinking that I had paid. I looked around to say goodbye to the young gentleman who had served me but he was not at the counter and the other young man was engrossed in the corner with something so I just walked out. I went a couple of steps down to a fab takeaway shop where I occasionally buy half a rotisserie chicken for supper. As I got outside the young gentleman from the cafe was standing outside waiting for me and I smiled and said hello and then he asked me if I had paid! I blinked a couple of times in shock, I think, and then it slowly dawned on me that in fact I had not. I apologised profusely and he was very understanding.

So I just want to thank him for the dignified and gracious way in which he approached me as such an event is mortifying! I do so hope I have the courage to visit the cafe again because it really is a lovely little haven to have a drink and I often pass it on my way home. It is well worth a visit!

So today is a picture of the beautiful little flower that emerges from your ball of tea. Only the border is in iColorama otherwise the entire picture was edited in Snapseed, an app which is even better now with the new features. The photo was taken with VividHDR.


This second picture was taken with Camera+and also edited in Snapseed

This final picture was taken in Hipstamatic with no editing

Wednesday, 4 March 2015

Day 63 of 365 Day Challenge

It's nasty outside today - rainy, grey and foggy - and I haven't got my daily photo yet and it's 4pm! I went out this morning and had the opportunity to photography some beautiful cut flowers but was distracted and then forgot. Now what.

I was at the library this morning and took out a book on etching because I thought some of the ink outlines were interesting and wondered if I could incorporate this into my photo manipulations.

Here are three variations of the end result and I think the first is my favourite although I quite like the third one which looks a bit like a watercolour. Below that is my process.

PROCESS:

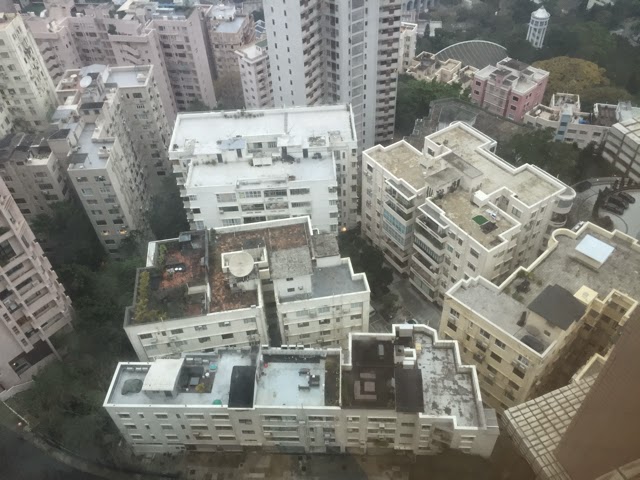
I decided to take a photo with my iphone of the roofs that we look down on because I thought sketching buildings would be interesting. I squared the photograph in Snapseed and tuned it up a bit and then took it into SketchClub. I created a layer above the photograph and proceeded to draw the outlines. Sometimes I was careful and sometimes a little scrappy but fairly accurate and just detailing the bits that stood out to me.

Original

Sketched Outline
I then took the original picture into Repix, I used the harsh Posterise and then Freshen to get this:


I took the sketched version into Photoshop Touch and removed the white using the magic wand. I then took both of these pictures back into SketchClub, overlaided the pen work and saved the result.


I could have left it at this stage but it didn't feel finished to me so I took it into iColorama and tuned it a bit using the Adjustment options. I then tried various transformations and the ones you see at the start are in order: Coherence>2, Painterly>Shock and Simplify>7 with opacity reduced by about a third.

Saturday, 7 February 2015

Thursday, 5 February 2015

Day 35 of 365 Day Challenge

Today's Picture: Model Mania
Wow, now for something completely different. Yesterday was a day of rushing around in the city getting things done and photography was the last thing on my mind. I got back home with 3 measly pictures compared with the over 130 I had taken the day before!

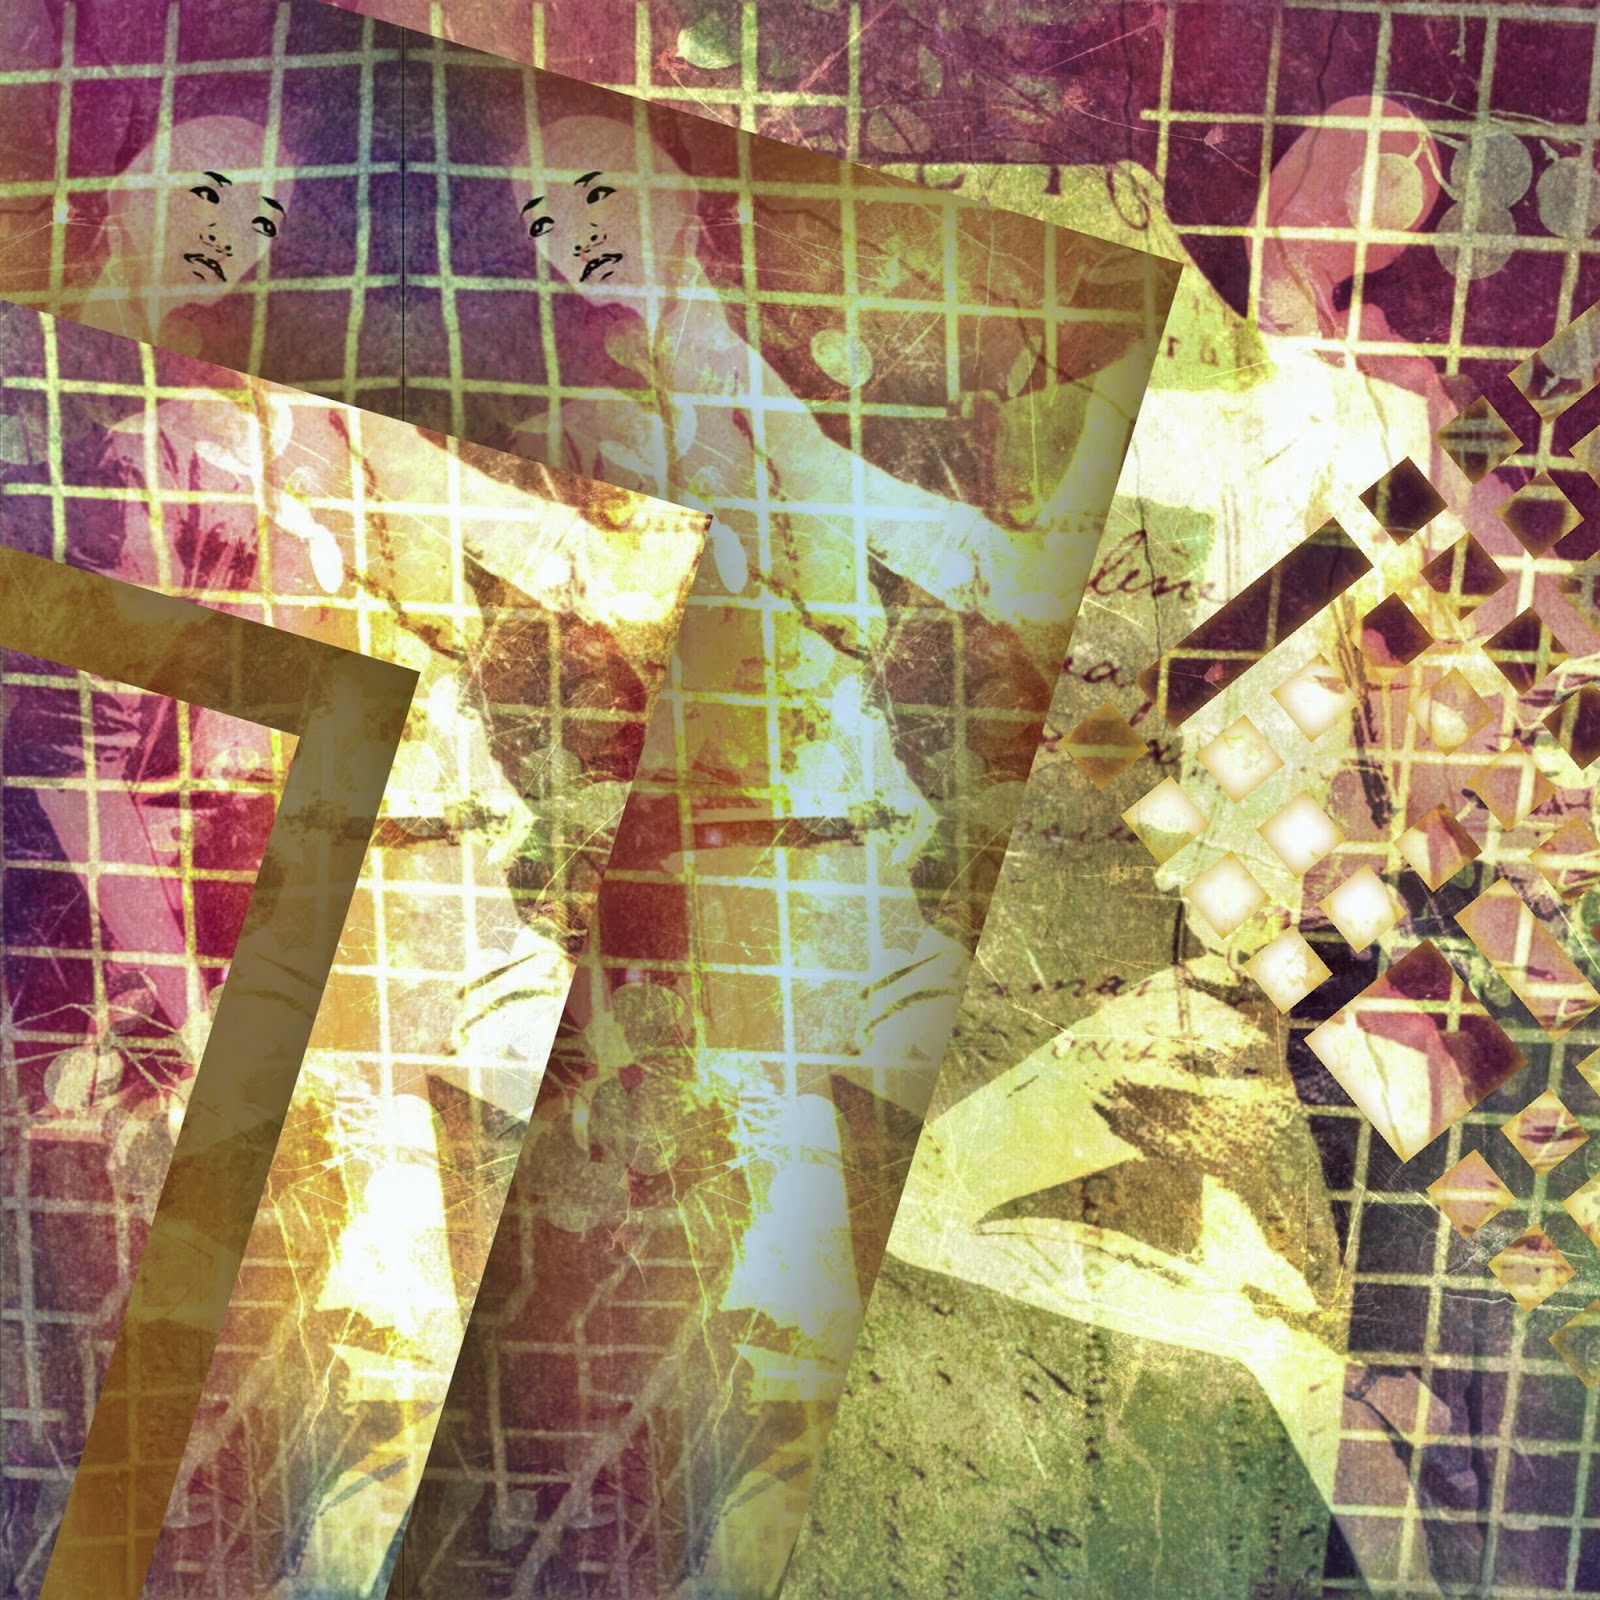
One of the three pictures was of a seamstresses' mannequin which was, of all places, in the ladies loo of a quirky coffee shop. I had taken pictures of quite a few dummies in the windows of shops at the mall the previous day and decided to create an abstract picture. I ended up using three pictures I took the day before and the mannequin I took today:

Looking at the pictures you would probably wonder what you could do with such a mottley lot. Well, I started off cropping the silver tree display and the mannequin and combining them in iColorama using the Effects>Mixer option and then taking it into Stackables to apply one of my own texture formulas:

Then I cut out two of the dummies from the first picture using both Photoshop Touch and Superimpose. In Photoshop Touch I then applied the Old Photocopy effect. Back into Stackables where I edited the Time Travel formula adding a further layer of blue:

Back into iColorama to use the Mixer again and combine the last two images. This is when I cut out the face of the lady in the coffee shop using Superimpose and applied Edges and Coherence to the face in iColorama to get a smooth black and white face. Back to Mixer to add the face to the first dummy.  I made some small changes in Repix but it still looked a bit plain so I took it into the app, Fragments, and added two fragments. Final tweeking in Snapseed. Phew.

Wednesday, 21 January 2015

Day 21 of 365 Day Challenge

A great graffiti found along the famous Hosier Lane in Melbourne. Just some slight tuning, cropping and resizing in Snapseed - the artist has done the rest for me! It would be crass to change it!


Saturday, 17 January 2015

Day 17 of 365 Day Challenge

Going home via the Mid-Levels Escalator on Hong Kong Island, I had my iPhone at the ready for any unexpected shots and as I got to one street level there were a group of people dressed in costumes at the pub called the Yorkshire Pudding. I took a photo from a short distance but as I came up level with them, the chap dressed as a lion turned around and growled at me. Well, like I'm gonna lose an opportunity like that?? Not. So I got one snap before carrying on and although I got some good shots today it just has to be the shot of the day. Just shows you - you always need to have your iPhone camera ready!

Taken with Camera+ and then into Snapseed for cropping and to apply a grunge effect:

Wednesday, 14 January 2015

Day 14 of 365 Day Challenge

Walking back from the city after a meeting, I took some city shots with Hipstamatic but I hadn't realised that my iPhone had shaken and changed the settings and most of the pictures I took were a red tinge which was just awful. I must get rid of that film, I really don't like it at all. Anyway, fortunately I had discovered this half way through my walk home and decided to walk back through a park to try and get my shot for the day.

Well, there was a little girl going around and around the fountain on her little scooter and I just had to have a picture of this. I am always a little reticent about taking pictures of children but they are wonderful subjects. So I chose a spot and waited for her to come around again. At the same time a little boy ran into view and as she came around he peaked out and looked at her. It was such a cute photo I had to try and do something with it.

The children were quite a distance apart so to make the picture square I first had to take it into Handy Picture to increase the top with the resize option. I am always enthralled by the way it just adds onto the top to match the picture. It made a couple of mistakes but this was easily corrected with the retouch button. Next, I went into Snapseed to use the Tune Up option.

What next?? From now on it was all iColorama. I wanted to give it more of a picture book appearance because there were children in it so to do this, I first chose Style>Edges and choose the Edges option I liked.  Then I returned to the original and used Style>Simplify>, number 2 but I put a mask over the children so that they remained sharp and applied and saved it. Then I blended the two with the mask still on so that the children were still the original but the background was more 'cartoonish'.

Then came the clever bit. While keeping the mask on I went to Preset>Borders and choose number 6 I think and turned down the opacity slightly. This made the children look as if they were on the fringes of the scene. Lastly I just blurred out the little boy's face in Repix as he is a child. Here is the result:


Tuesday, 13 January 2015

Day 13 of 365 Day Challenge

It's a miserable day outside and I don't intend to go out so what to do about my daily iPhone picture??

Well, we have a magnificent view from our apartment and I guess this will be the subject of many of my day challenges this year so the secret is to make it interesting.  While trying out loads of shots I noticed that the window in our bedroom is steamed up with the cold and rain so I decide to make use of this. I am using the camera app VividHDR for the first time so experiment with a couple of the options and the best turns out to be Dramatic HDR.

Once I have taken the picture I bring it into Snapseed and Crop it and Tune it a bit. Then into Stackables and layer it with the layers Ancient Sky and Sundance. Finally, I take it into iColorama to add a vingette. I find the Preset>Border, border #3 with lowered radius and opacity has become my favourite vingette for finishing off a photo.

So here it is:
Window to the World

Saturday, 13 September 2014

Snapseed, PixlrExpress, iColorama

I'm still trying out loads of photo apps and really starting to narrow down the ones I want to use.

I love Snapseed for the initial cropping and subtle enhancing but I find the filters and effects quite limited so I tend to move onto something else after that.

I have been looking for another free app to use in my courses that will fill this gap.  At the moment I think Pixlr Express by Autodesk is the one although Adobe Photoshop Express is a possibility too. My concern about Pixlr Express is that this current version is a little buggy. Sometimes I load a picture and it shows nothing and sometimes it crashes on a save but it does have some nice effects.  I manipulated this butterfly picture using the adjustment>stylize>watercolor option and then applied a border:

It's useful to know that Autodesk also have an online version and a free Windows or Mac App that you can upgrade to Pro.

The app becoming my absolute favourite is iColorama (sorry, I know I keep on mentioning it but it is just awesome). By the way make sure you download the right version. When I was watching some tutorials online I couldn't understand why the features were different and then discovered that I was using the iPhone version (iColorama S) on the iPad and the iPad version has a little more so needless to say I have bought both!

I therefore couldn't resist trying out some of the options in iColorama I haven't looked at yet. Here are two results:


I got this by going to Style>Edges and then putting a mask using the Brush Mask on the butterflies and flower to make them come through.

The next one was a big surprise and I got it by going to Form>Tiles and trying one of the tile options:


Tuesday, 2 September 2014

Chinese Lady

I took this wonderful picture in the fishing village of Tai O on Lantau Island. There was a lot of clutter around when I took the picture so I wanted to make it fade into the background leaving her as the central point. I also wanted to give it an old look but still maintain her colourful garb.

Apps used on the iPad: Snapseed, iColorama S, Image Blender.

Monday, 1 September 2014

iPhonegraphy: more iColorama S

Wow, this is a seriously good app but not so easy to get your head around. I think it will take some time before I can say I am proficient but here is my latest try. This was a picture of a Bali Starling taken with my Samsung Ace in the aviary in Hong Kong Park. The original picture was not the best and I am really happy with the result. I first cleaned the photo up a bit in Snapseed and then used iColorama S. I started with Style>Simplify using the option #1 on a middle opacity. Then I added a bit of noise under Effects.  Finally I went into the Brush and using Bound just painted in the areas you see here. Magic!


Friday, 29 August 2014

Reflections

Here is the photo mentioned in my previous blog. Taken with an iPad using Procamera 7 and manipulated in Snapseed.

Street Photography: being your own critic

Up 'til now many of my photographs have been nature: flowers and animals which I love photographing particularly birds. It's quite simple. If I get a clear sharp picture of a bird it's likely to make a great photo manipulation. Although this isn't always easy it helps to have a good camera with a zoom.

Going out on the street with a device is another matter entirely! First of all it's finding an interesting shot and then getting a sharp picture without a fancy camera! I went to a place near where I catch my bus home to have a coffee. It's in a smart office building and when I came out I looked around to see if there was a shot worth taking. It was 4.30pm on a sunny day and the light was perfect. I looked and thought, 'oh my goodness, the building outside and the people sitting on the verandah are reflected on the marble floor inside, what a fantastic picture'. I snapped madly from a distance and closer to try and get the perfect shot.

When I got home I looked at the pictures carefully and perhaps have one that I like. I realised that I have to spend more time really evaluating my scene before taking a picture. In this case, I needed to get closer to the floor to get a more symmetrical balance between the outside and the reflection on the inside. If time is not an issue, I think the secret is to take a couple of pictures, really evaluate them and then take better ones.

Street photography is really forcing me to be a much better photographer.

I think I will go back and try and get a better shot on a another day.

However, on the ferry today I was having fun trying out different filters in the aremaC app which you can use whilst you are actually taking the shot.  I took this picture on my iPad and the only post-processing I have done to this picture is to crop it in Snapseed:


Thursday, 28 August 2014

iPhoneography: out on the street

I have been hesitant to get into iPhoneography because up until now I don't think the cameras in smartphones and devices have been good enough. I always carry a point-and-click with me so I still get the unexpected shot. Also, although I have an old Samsung Ace smartphone I actually use an ordinary Nokia which has a dual sim (allows 2 sim cards) which I need and love. It also only costs me £7 a month to run! On the other hand I couldn't do without my tablets and these easily and more conveniently take the place of a smartphone.

However, now the apps on the smartphones and tablets for photo manipulation have become so good and are such fun I am in a quandary.  If I want to get more seriously into iPhoneography, what now?? The new iPhone '6' is due to come out any moment which is purported to have a much improved camera. But it is also rumoured to cost a bomb. Can I honestly justify buying a phone plus special lenses which will amount to the cost of a decent DSLR!!? Especially as I am not interested in buying it to use as a phone.

Anyhow, I have to make do with what I have at the moment so I went trotting down to Hong Kong Park late afternoon on a lovely day to see what I could do with my Samsung Ace. I realised very quickly that I use my zoom lens constantly and getting any decent shots was a challenge although I quite enjoyed that. Usually after a photography session like this I would come home with quite a few shots that I would be very excited about and be inspired to do something with but anything which was clear was quite ordinary and many shots I couldn't take because the subject was just a little too far away. Disappointing.

Last night my hubby was out for supper so I decided to go out early evening with my iPad this time and see if I could get some candid shots in a coffee bar or restaurant. These weren't great but I did get some interesting shots on the night streets. I was so tempted to pull out my proper camera and felt like I missed some great opportunities to get some clear shots. I used the Procamera 7 app on my iPad to improve the shots and realised that I need to understand the app a lot better. I took 176 shots and found about three that I might possibly use.

So here is my first try. I love the shot itself even if it isn't as clear as I would have liked but not convinced that the final manipulation is quite right. It is so important to know your tools WELL and I am not quite at the stage where I know where to go to get that special filter or tint or whatever but I am getting there and thoroughly enjoying the challenge.

Here is the original shot. I loved all the black and white lines and the fact that the pizza maker was wearing a striped shirt too although it isn't evident in this shot:


Here is the final manipulation. The apps I used were Procamera 7, Snapseed, Noir and iResize.

I did another one adding textures and grain but decided I like the simple black and white of this one.

Monday, 25 August 2014

iPhoneography

I've been experimenting with all sort of apps on the iPad to test them out and see which ones I might use on a regular basis.

Here is my latest try. The picture was taken with an ordinary camera as I don't yet have a library of smartphone pictures that I can use and I am keen to get up to speed with the iPad apps.


Here are a list of all the apps I used. Snapseed, Superimpose, Leonardo, aremaC and Artrage. I think these apps may well be the core of what I use in the future but there are so many exciting apps that I am sure it will only be the start!

Wednesday, 13 August 2014

Photo Apps on iPad, Tablets or Phones

I was asked the other day to give a short course for a group of ladies about using photo apps on an iPad or Tablet. Photoshop Touch came with my Samsung Galaxy Tab and I thought this might be worth teaching so I set about teaching myself the app in earnest.

Actually, there is very little out there on it and I eventually got quite proficient but it is honestly not an easy app to use if you haven't used Photoshop or Photoshop Elements and certainly not an app you could teach to a group of ladies who haven't used a photo editor before.

I wanted to find a app that worked on both iPad and other tablets and possibly a phone too. I also wanted an app that had funky filters so that people could have fun changing their photographs. Well, I came across some great options and I am still in the process of trying them out but the one I tried today was Snapseed and I have to say I like it immensely. The great thing is that it's free! I might see if I can get a video together to show you how it works if there is some interest.

I used photos that had something wrong with them so that I could fully test the features of the app. Here is my first example:


I honestly thought this photograph was a lost cause but I had great fun messing about with it in Snapseed and was delighted with the result:


If I was to do it again I would cut the chap off on the right which I think spoils the composition and the texture that was applied makes the neck of the young lady on the right look dirty so I would try a different texture.

The app takes a little getting used to until you realise how to swipe the tablet properly. When you are within an adjustment panel dragging your finger left and right lowers or increases the intensity of the adjustment such as brightness. Dragging your finger up and down gives you different kinds of adjustments such as saturation or contrast. It took me a while to discover the second option.

The main adjustment I used here was the Selective Adjust and to start off with it seems impossible to use but when you get the hang of it, it is an extremely powerful tool. I was able to add a 'control point' to highlight myself on the left and up the brightness, then add one to the young lady on the left to do the same. I could control the area which was effected by the adjustment. Finally I could up the contrast of the buildings in the distance.

I then added an HDR Scape which made it really pop. I think I then I added a Retrolux and finally a Frame. I have to say I can't quite remember the steps as I was so engrossed in trying out different options.

Here is my next example with two completely different sets of effects.  I have reduced the quality of the images for the internet but both the original and result were good quality:


With this third example I tried all sorts of effects on the same photo so it became a bit of a mish-mash of adjustments and the final result not quite what I wanted but an interesting exercise:


My final example took less than 5 minutes to produce!