I am creating a mini course on converting photographs to black and white and how you can use them in art and crafts or just as black and white photos. Here's a taster of one of the techniques I will cover:
While I was creating a logo for a client's website, I quite by accident stumbled upon a way of creating a silhouette logo which was more than just black and white but also had another layer of shading. I added a different coloured background to this and was really taken with the result.
Here is an example:
I took this picture of a man on the 'High Line' in New York:
This picture works particularly well because there are lots of different values (shading) throughout the picture. If there had been just darks and lights, it wouldn't have worked so well.
So here is how I did it. The different levels of shading are created using the threshold filter and you can decide how many layers you want. In this example I used 3 layers but you will be able to see how it looked with 2 layers.
- Open your photograph in PSE and copy the picture to 3 layers by pressing cntl+j (Mac cmd+j) 3 times.
- Switch off the top 2 layers by clicking the eye on the layers panel and select the first copy.
- Now go to the menu bar and select Filter>Adjustments>Threshold...
- Move the threshold so that it is fairly dark, press ok and rename the layer 'dark'.
- Here is my first layer:
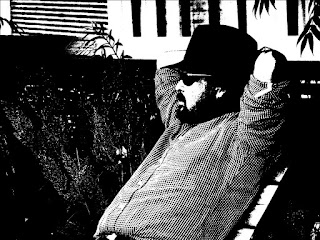
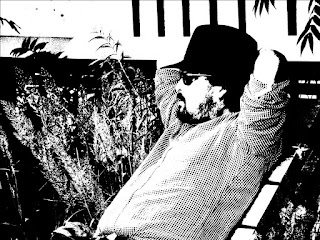
- Now turn on the second layer, go to Filter>Adjustments>Threshold... and set the threshold to neither light nor dark and call it 'middle':
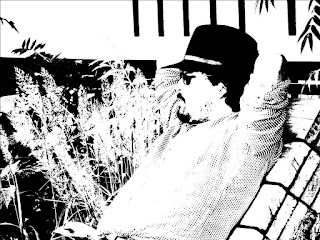
- Finally turn on the top layer, go to Filter>Adjustments>Threshold... and set the threshold to a lighter setting and call it 'light':
- Select the original bottom layer and press the new layer icon on the layers panel.
- Choose a colour from the colour swatches panel and making sure the new blank layer is selected, press Alt+Backspace (Mac Option+Backspace) to fill the layer with the colour. I used the colour #e0a84f.
- Switch off the top 2 layers again and change the opacity of the 'dark' layer to about 40% (you can play around with the opacity later).
- Switch on the 'middle' layer and change the opacity to about 45%.
This is what you get at this stage and you might not want another layer: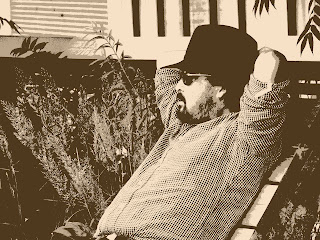
- Finally switch on the 'light' layer and change the opacity to 32%. I've added the top picture again so that you can compare it with the two layer one:
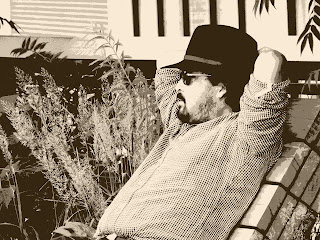
What you might notice is that I removed the spots on the top left because they were distracting. I combined all the layers first and then cleaned up the spots by brushing them with the colour that was around them. The keystrokes to combine all layers to a new layer is Shift+Ctrl+Alt+E (Mac Shift+Cmd+Option+E)
Here is what your layers should look like:
You can go back and experiment with the opacity of the layers or change the background to another colour. If you decide not to have a coloured background just keep the opacity of the 'dark' layer to 100%.


