Ah now, this is the way to go. LOVE printing on fabric.
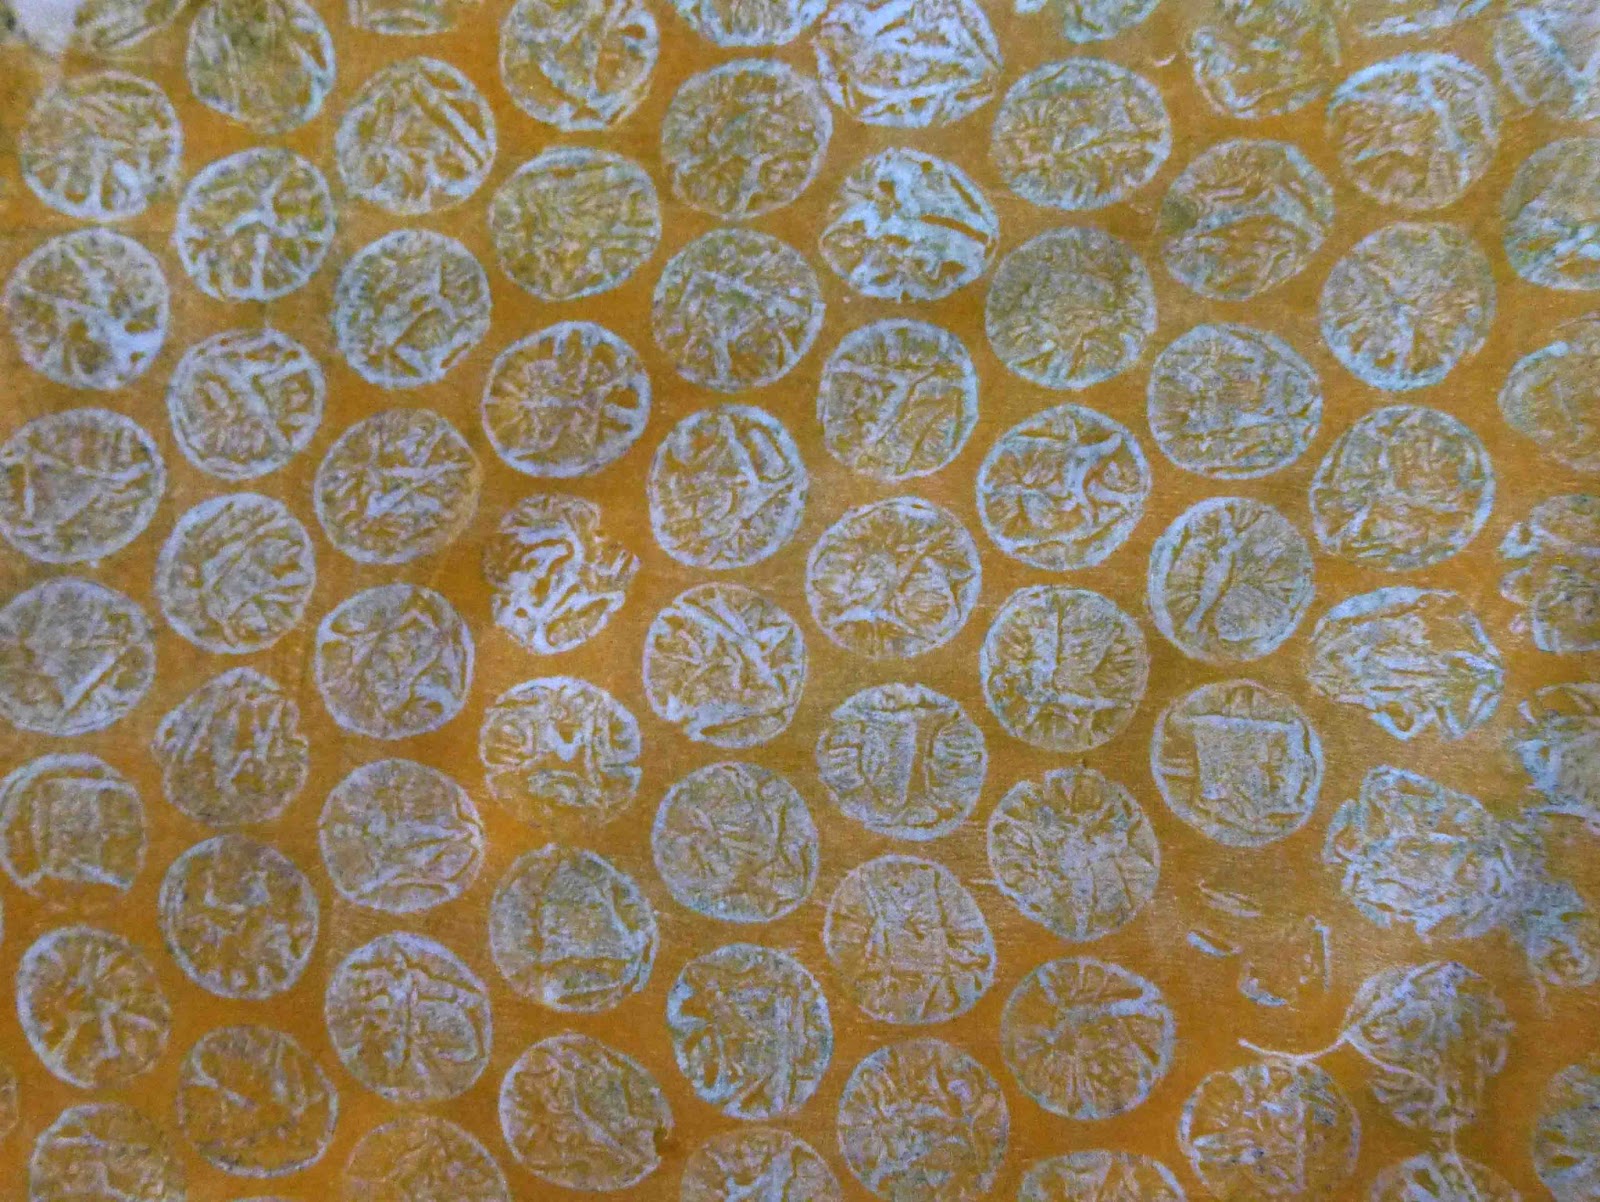
I used some pieces of sheet cotton and Pebeo Setacolors and Jacquard Lumiere. I occasionally mixed the two types of paints together because the Lumiere gives a lovely sheen. I also added Pebeo's Setacolor medium which meant my paints went further.
First layer I used textures. My favourite were a fun foam stamp, bubblewrap (awesome), wallpaper and a grouting tool to make lines:
On the second layer I used positive stencils and some foilage. Here are my best results:
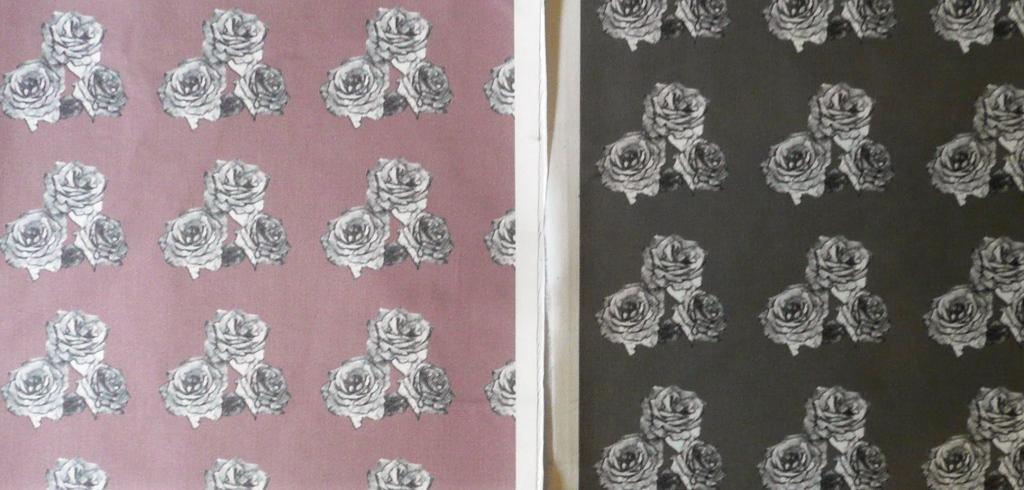
Finally, I blended some of my not-so-good results with the better results in PSE and came up with these:
Showing posts with label Fabric Printing. Show all posts
Monday, 8 July 2013
Thursday, 12 January 2012
Phone Bag Complete
I've completed my 'phone bag' and I'm pretty pleased with it:
I learnt quite a lot from making it and here are some tips that might be useful if you want to make one:
- If you want to make it double-sided make sure that the fabric is thin. The fabric I used here was too thick and I wouldn't bother to turn it the other way round - too much hassle.
- I used little stick on velcro circles on the inside to secure the top which also makes it one-sided but very convenient. Whether they will fall off remains to be seen! Maybe worth sewing them on before you attach the inside and outside.
- Also, next time I think I would put the right sides together of the outside and inside, sew all the way around with the loops in place, leaving a small gap, turn it right-side out and then just sew up the sides close to the edge. Trying to sew around the narrow top was very fiddly when I tried to put the inside and outside together.
Tuesday, 10 January 2012
Phone Cover / Bag: Printing and Sewing Fabric
I was given a new phone for Christmas and wanted to create my own cover. I also wanted to create a little bag that I could hang down from my neck to contain my phone (and later realised that if I made it big enough I could use it for glasses as well).
I have finally loaded the latest version of Photoshop Elements on a Windows 7 operating system and, boy, did I have trouble printing the fabric. I gave up trying to print a custom size and chose an existing print size. The size that worked well for what I wanted was the US legal size 8.5 by 14. This was the exact size I needed (I printed it without borders so that it took up the entire 8.5 by 14 although I cut my fabric slightly larger than this). If I cut it down the middle lengthwise, the one half was perfect for the outside and the other half the inside fabric.
So I took the outside piece and put a piece of thin batting under it. I then quilted the outside piece and lined it with the inside piece. Here are some of my fabric prints and some of my samples. I haven't finished my final 'phone bag' yet so these ones are shorter and are not big enough to hold my glasses. Also I decided for my final version not to have a flap but a piece of velcro on the inside. The button takes too long to open and a flap means using some of the length or printing out more fabric.
All the fabrics were designed in Photoshop Elements and printed on my Epson pigment printer (you can see I have quilted the strip on the right):
I have finally loaded the latest version of Photoshop Elements on a Windows 7 operating system and, boy, did I have trouble printing the fabric. I gave up trying to print a custom size and chose an existing print size. The size that worked well for what I wanted was the US legal size 8.5 by 14. This was the exact size I needed (I printed it without borders so that it took up the entire 8.5 by 14 although I cut my fabric slightly larger than this). If I cut it down the middle lengthwise, the one half was perfect for the outside and the other half the inside fabric.
So I took the outside piece and put a piece of thin batting under it. I then quilted the outside piece and lined it with the inside piece. Here are some of my fabric prints and some of my samples. I haven't finished my final 'phone bag' yet so these ones are shorter and are not big enough to hold my glasses. Also I decided for my final version not to have a flap but a piece of velcro on the inside. The button takes too long to open and a flap means using some of the length or printing out more fabric.
All the fabrics were designed in Photoshop Elements and printed on my Epson pigment printer (you can see I have quilted the strip on the right):
Saturday, 20 August 2011
Another Day of Fabric Printing
I have been busy doing a new picture quilt and I needed some fabric to go around the edges so set up designing fabric in Photoshop Elements in the right colours. It's hard to believe that my original pictures/pattern were these:
These are the printed fabrics:
Just a tip - never throw out blurred pictures that you think are useless. I use all my dud photos as backgrounds!
These are the printed fabrics:
Just a tip - never throw out blurred pictures that you think are useless. I use all my dud photos as backgrounds!
Friday, 12 August 2011
Patterned Fabric
Been experimenting with pictures to make patterned fabric with the intention of possibly quilting them into small bags. I created a pattern out of the fur and used it as a background then smoothed the animal into the pattern.
To create a new pattern in Photoshop Elements:
- Open the picture you want to take the pattern from.
- Select the Rectangular Marquee Tool (press M)
- Select area that you want to make into a pattern by click and dragging around it. Move the selection as required.
- Go to the main menu and select Edit>Define Pattern....
- Name the pattern and save.
Wednesday, 27 July 2011
Fabric Painting with a Stencil
I dug through my stash of fabric which had a wash of fabric paint and found one to experiment with. A wash of Pebeo Setacolor fabric paints had been applied using a sponge. So using the stencil created in my previous blog, I cut out the stencil on freezer paper using the Cricut machine. I then ironed the freezer paper onto the fabric and applied some blue paint. This is the result:
Gee, I'm really quite pleased with that. The beauty about going through all the hassle of converting the picture to use on my Cricut is that I can cut it out as many times as I want. The freezer paper can only really be used once for this.
Thursday, 14 July 2011
Just started an Online Beginners Embroidery Class
My online beginners embroidery class with Susan Sorrel started last week. I finished painting the fabric yesterday and had such fun using bubble wrap that I ended up covering my test fabric with it as well! I can see why so many fabric artists and journal makers use it - so addictive!
So here is the section of fabric I have chosen to do my embroidery on:
I went shopping this morning to get the the embroidery threads I wanted and the right size hoop. I'm very lucky because I have a little quilt shop called Needle and Thread just 10 minutes away from where I live.
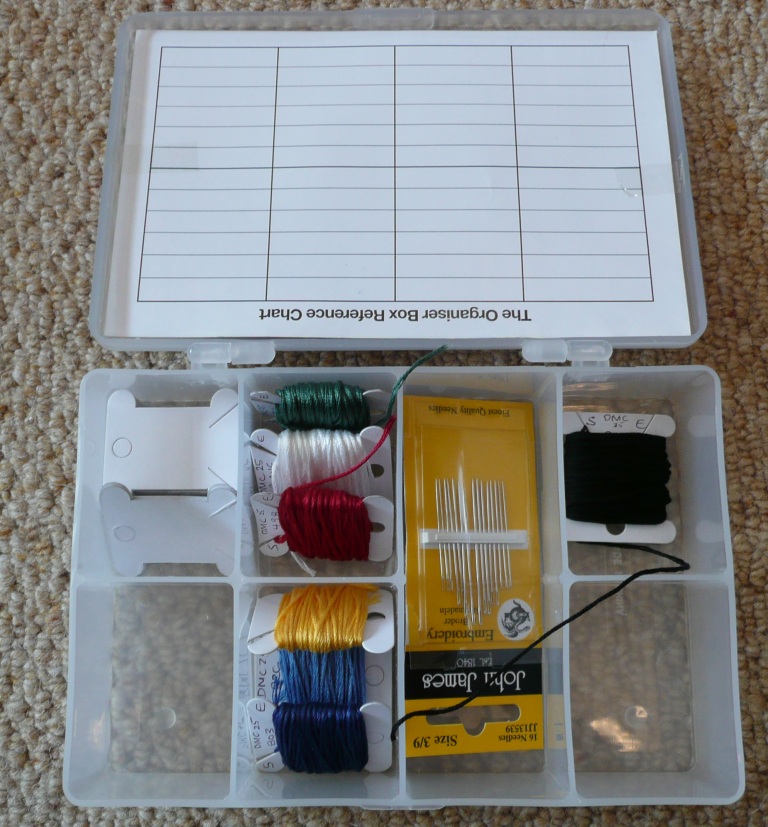
I am sure that my threads would all get tangled up so I decided to get organised from day one. I put my threads on little cards with the details written on them and put them all in a little box. Wonder if I'll keep it this way but I do like it.
So here is the section of fabric I have chosen to do my embroidery on:
I went shopping this morning to get the the embroidery threads I wanted and the right size hoop. I'm very lucky because I have a little quilt shop called Needle and Thread just 10 minutes away from where I live.
I am sure that my threads would all get tangled up so I decided to get organised from day one. I put my threads on little cards with the details written on them and put them all in a little box. Wonder if I'll keep it this way but I do like it.
Sunday, 10 July 2011
A Morning of Printing
Printing on fabric using an inkjet printer is not for the faint hearted but I LOVE making my own material and it is worth all the effort as far as I am concerned.
I bought a continuous inking system with quality ink which makes the ink a lot cheaper but it requires some setting up and if something goes wrong you need to be prepared to surf the net to get answers. I now have a good idea of most of the foibles!
I like to leave a whole day for printing because once a printer is working well and the ink is flowing, it is worth doing as much as possible. One things for sure, do all the printing you want for one article because tomorrow the printer might be printing a different shade!
I start off by making sure all my ink tanks are full. In your case, make sure that the cartridges are full. There is nothing worse than the printer failing half way through a print or print run.
I redid my paper samples and a small fabric sample to check that the ink was coming through properly. It was printing well so I decided not to do a nozzle check. Big mistake. Ran my first print and the ink flow changed after a couple of lines.
Actually a nozzle check is not always a perfect indication of ink flow. I have printed a perfect colour test print and it suddenly goes belly up. So I did a couple of print head cleans and after that all went well.
A major tip when you are about to put your fabric through the printer, get a piece of sticky tape and dab the sticky part of the tape over the fabric to pick up any bits of lint or cotton. Believe me, there is nothing more irritating than taking out a perfect print and a small piece of thread comes away leaving a white stripe!
I have to say, too, that putting a strip of masking tape along the front edge definitely cuts down the number of times the material doesn't go through.
Here are some of the samples:
I bought a continuous inking system with quality ink which makes the ink a lot cheaper but it requires some setting up and if something goes wrong you need to be prepared to surf the net to get answers. I now have a good idea of most of the foibles!
I like to leave a whole day for printing because once a printer is working well and the ink is flowing, it is worth doing as much as possible. One things for sure, do all the printing you want for one article because tomorrow the printer might be printing a different shade!
I start off by making sure all my ink tanks are full. In your case, make sure that the cartridges are full. There is nothing worse than the printer failing half way through a print or print run.
I redid my paper samples and a small fabric sample to check that the ink was coming through properly. It was printing well so I decided not to do a nozzle check. Big mistake. Ran my first print and the ink flow changed after a couple of lines.
Actually a nozzle check is not always a perfect indication of ink flow. I have printed a perfect colour test print and it suddenly goes belly up. So I did a couple of print head cleans and after that all went well.
A major tip when you are about to put your fabric through the printer, get a piece of sticky tape and dab the sticky part of the tape over the fabric to pick up any bits of lint or cotton. Believe me, there is nothing more irritating than taking out a perfect print and a small piece of thread comes away leaving a white stripe!
I have to say, too, that putting a strip of masking tape along the front edge definitely cuts down the number of times the material doesn't go through.
Here are some of the samples:
Friday, 8 July 2011
Fabric Preparation for Printing
I find preparing fabric for printing a very boring process so I try and get lots of pieces of material done in one go. I am lucky to have an A3 pigment printer (rather than a dye printer) which is better for printing on fabric. This means that I can print on much larger pieces of fabric. However, the bag I am making is not going to be very big so I am sticking to A4 size pieces of fabric.
So these are the steps I go through:
It is very important that the side that goes through the printer has been very well ironed so that it is firmly attached to the fabric. When I finally use the fabric for printing, I use the rotary cutter to cut along the edge that goes through the printer to make sure that it is 'sharp'. I also recheck that the freezer paper is firmly attached.
Always prepare at least double the amount of the material you need. Once I get started with printing, I like to do a lot and you can never legislate for what might happen half way through a print!
* edit: for those of you who don't know what freezer paper is, it is paper originating from the US which has a shiny side which temporarily adheres to fabric when you iron it onto the fabric. It is available here in the UK at quilt shops, some hobby craft stores and some sewing/fabric shops.
So these are the steps I go through:
- Cut the white fabric down to sheets just larger than A4.
- Cut pieces of freezer paper* down to just larger than A4.
- I iron each bit of fabric first.
- Then I iron the freezer paper to the back of the white fabric. I iron on both sides with the fabric side last to make sure that there are no 'bubbles'.
It is very important that the side that goes through the printer has been very well ironed so that it is firmly attached to the fabric. When I finally use the fabric for printing, I use the rotary cutter to cut along the edge that goes through the printer to make sure that it is 'sharp'. I also recheck that the freezer paper is firmly attached.
Always prepare at least double the amount of the material you need. Once I get started with printing, I like to do a lot and you can never legislate for what might happen half way through a print!
* edit: for those of you who don't know what freezer paper is, it is paper originating from the US which has a shiny side which temporarily adheres to fabric when you iron it onto the fabric. It is available here in the UK at quilt shops, some hobby craft stores and some sewing/fabric shops.
Thursday, 7 July 2011
Fabric Printing
Time to do some more fabric printing. I have an outfit which I love and which needs a small bag to complement it so I have set about designing some fabric for it.
The outfit consist of grey jeans, a grey t-shirt, a light salmon jersey and a beautiful grey and salmon scarf:
The most difficult part of this is trying to match the colours. There are 2 ways I do this: either by scanning my outfit and trying to match the colours from this or by using a colour swatch.
I bought my colour swatch quite recently and already feel that I am getting a much better match. It only came out in March, I see, but already I find it indispensible (both UK and US Amazons have it). The back of the cards show the CMYK, RGB and Hex colour numbers. These are the settings you can change in Photoshop Elements to get the exact colour on the card. However, don't think you printer will necessarily print this colour! This requires colour calibration which can be a drawn out or even an expensive endeavour. I will one day spend more time getting this right but happy for now just to print out swatches and get the best match.
When I compared my jersey with the swatch I couldn't believe that the colours that matched were on the Orange and Yellow-Orange colour cards and in fact the colour I chose was on the Yellow-Orange card. I tend to go for a colour which is lighter than the original because the swatch colours on the card are small and become more intense when the area is bigger, secondly, they often print out darker on fabric and lastly, I find a slightly lighter colour often matches better.
I first print out a colour swatch on paper and once I have it right I print it out on fabric because the colours can still change. I then write down the colour combinations and the printer settings on the print-outs. Oh yes, and I also write down on the fabric, the fabric I used - in this case I used Cotton Sateen Arian White which is my favourite at the moment (I bought it online from Whaleys in the UK). If you don't print out the fabric on the same day, it is worth reprinting samples just before you do the print run - so much depends on the printer! I have decided on using 2 different fabrics - one with dots and one with stripes. Here is an example of my stripe print-out:
The outfit consist of grey jeans, a grey t-shirt, a light salmon jersey and a beautiful grey and salmon scarf:
The most difficult part of this is trying to match the colours. There are 2 ways I do this: either by scanning my outfit and trying to match the colours from this or by using a colour swatch.
I bought my colour swatch quite recently and already feel that I am getting a much better match. It only came out in March, I see, but already I find it indispensible (both UK and US Amazons have it). The back of the cards show the CMYK, RGB and Hex colour numbers. These are the settings you can change in Photoshop Elements to get the exact colour on the card. However, don't think you printer will necessarily print this colour! This requires colour calibration which can be a drawn out or even an expensive endeavour. I will one day spend more time getting this right but happy for now just to print out swatches and get the best match.
When I compared my jersey with the swatch I couldn't believe that the colours that matched were on the Orange and Yellow-Orange colour cards and in fact the colour I chose was on the Yellow-Orange card. I tend to go for a colour which is lighter than the original because the swatch colours on the card are small and become more intense when the area is bigger, secondly, they often print out darker on fabric and lastly, I find a slightly lighter colour often matches better.
I first print out a colour swatch on paper and once I have it right I print it out on fabric because the colours can still change. I then write down the colour combinations and the printer settings on the print-outs. Oh yes, and I also write down on the fabric, the fabric I used - in this case I used Cotton Sateen Arian White which is my favourite at the moment (I bought it online from Whaleys in the UK). If you don't print out the fabric on the same day, it is worth reprinting samples just before you do the print run - so much depends on the printer! I have decided on using 2 different fabrics - one with dots and one with stripes. Here is an example of my stripe print-out:
Wednesday, 11 May 2011
Album Cover
I have to decided to make an album cover for my dear friends who have given me their vintage photographs. When I took the photos out of the albums to scan, the sticky plastic covers didn't stick back again and I was worried about the photos dropping out.
I thought also that it would be a good test to see what fabrics would work well with the vintage photographs. I found a brown floral material which I bought to use for the first cover. I added some wadding and backed it with calico once I had attached the photos. This photo shows the material with right sides together before I turned it inside out.
Here is the cover with the the material the right sides out before I sewed down the sides and added the ribbon to keep the flap closed:
I thought also that it would be a good test to see what fabrics would work well with the vintage photographs. I found a brown floral material which I bought to use for the first cover. I added some wadding and backed it with calico once I had attached the photos. This photo shows the material with right sides together before I turned it inside out.
Here is the cover with the the material the right sides out before I sewed down the sides and added the ribbon to keep the flap closed:
Subscribe to:
Posts (Atom)