Pages - Menu

Sunday 31 July 2011

I'm on a Mission

My dear Mom is turning 90 in two weeks time.  She loves doing jigsaw puzzles to keep herself busy and I managed to find large format 250 piece puzzles by Emporium.  Three months ago she had a haemorrhage in the back of her right eye and now her eyesight has got too bad to do these puzzles.  She keeps on asking me if I can't get puzzles which have less pieces but I just can't find any these days which are not for children.

I haven't been able to think of a good present that I can buy her.  At her age there's not much that she wants.  So I suddenly thought, that's it, I am going to make her a puzzle for her birthday!  I have a Cricut cutting machine which cuts cardboard and I know how to make the shapes.  So I rushed out and bought a large 100 piece children's puzzle as a guide.  I put it together, turned it over and marked the edges with a thick black pen.  I then divided it up into four sections and scanned each section in (bottom right here) and then merged them all.  I then erased the pink background with the background eraser tool.


I know that because of the thick, rough lines it will not import properly into the Cricut software so I intend to pull the image into Inkscape and draw it from scratch.  It will be a good learning experience for me and although I know it will take me a while, once I have it, I can cut any number of puzzles, any size from A3 downwards!  I can keep Mom happy for ages!

So this is the picture I want to make into my first puzzle.  I will put Happy 90th on the balloon.  This is my family on a ship many moons ago - I'm the little girl on the left.  The well-worn rag dolls were made by my Mom.


I do so hope I can make this work.  If I do, I intend to upload the Cricut file onto the internet so others can use it!

Saturday 30 July 2011

Organising Computer Files...

Yesterday I put aside the whole day to organise my arty-crafty files but I didn't get very far....

(I am afraid this is a long and wordy post with no pictures but maybe I can save you some time - it took me a whole day to come to the conclusions I did.)

I have millions of computer files relating to art:  videos, photographs, pictures, ebooks, articles, pdfs.  I have them well organised on my computer and if you were to ask me for a specific file, I could find it pretty quickly.  However, if I need to find information on a specific topic it wouldn't be quite so easy to get all the information together.  Photographs are the biggest problem:  IMG_0016 really doesn't tell you anything about the picture!  There is also no point in printing out many of the files as paper files - just too expensive to print colour. 

So I had to sit down and think about how I could make all this information more searchable.  I realised this is what I needed to do:
  1. Rename photographs easily and in bulk to have meaningful names.
  2. Add keywords or tags to files so that they will be found in a search.
It was clear that the Windows File Manager was not going to be adequate for renaming.  You can do a bulk rename but only if you change the name completely and it adds brackets which I think is odd.  I wanted to keep the last 4 numbers at the end of the filename to maintain the sequence in which I took the pictures.  Also, you can't add tags in Windows XP.  You can in Windows 7 but not all files - specifically pdfs due to jostling between Adobe and Microsoft.

So what about Photoshop Elements?  Well, you can do bulk renames and keep the last 4 digits but you have to maintain the same number of digits.  For example IMG_0160 could be HAMP0160 but this really doesn't make much more sense to me - I want HamptonCourt0160.  You can tag in PE but then only PE recognises them and you can't do a search on files which are not pictures or videos.  I want to do a search on all files at once.  Also moving files to another computer causes problems.

After many hours of googling, I found two main packages which seem to do the job: Powerdesk Pro and Directory Opus.  However, there are complaints about Powerdesk Pro being too slow and Directory Opus becoming too complicated.  What concerns me about using additional software is that if you don't have the software, all the tags etc you put in become meaningless.  Many people solve this by finding software that runs from a memory stick and I think Directory Opus can do this - not sure about Powerdesk.

By the end of the day, I came to the decision that for the moment I would find a workaround.  There is a lot of little freeware packages out there which seem to do a good job. I found a good freeware package called FreeCommander which enables me to do bulk renames easily and the way I want to.  Also, I think it has directory comparisons which would be a real bonus for me.  I am hoping that when I find out more about it, it may well do a lot of what I want.  The one negative is that there isn't a version for Windows 7 but if I get my renaming done in XP I can cross that bridge later.

I have computers with both Windows XP and 7 and I have decided to do most of my tagging in Windows 7.  I tagged some files in Windows 7 and when I took them back into Windows XP, the tags were found when I did a search on file contents.  Excellent.  Bulk tagging looks easy too in 7.  Will have to add a post when I get proficient in this.

The only problem is pdfs.  But to be honest, although searching the contents of a file is slow and may not be accurate it is 'doable'.  I am not about to buy Acrobat to tag pdfs as it costs a small fortune.  There is other software out there which does the job but there are only so many hours in a day!  A workaround that some people use is to create a Word document with the same name as the pdf and add keywords to that and then attach it to the pdf.  Not sure that I want to go that route.  It's going to take me forever to tag the files I can tag!

DISCLAIMER:  software mentioned on this blog is downloaded at your own risk.

Wednesday 27 July 2011

Progress on Bag

At last I have had time to make some progress on the bag I am making out of the fabric I printed (see here).  I found some lovely grey lace with roses and added this to the flap but in the end I got a bit carried away adding stitching and felt that it was just too ornate for what I wanted so will use it in something else:


This is the main body of the bag showing the dots which I am machine embroidering:


Not sure yet what is going to be the front and what is going to be the back.  The flap is now probably going to be dots so I think the stripes will be the front.

Fabric Painting with a Stencil

I dug through my stash of fabric which had a wash of fabric paint and found one to experiment with.  A wash of Pebeo Setacolor fabric paints had been applied using a sponge.  So using the stencil created in my previous blog, I cut out the stencil on freezer paper using the Cricut machine.  I then ironed the freezer paper onto the fabric and applied some blue paint.  This is the result:

Gee, I'm really quite pleased with that.  The beauty about going through all the hassle of converting the picture to use on my Cricut is that I can cut it out as many times as I want.  The freezer paper can only really be used once for this.

Monday 25 July 2011

Creating a Stencil

NOTE OCT 2011: Since writing this piece, Provocraft, who manufacture the Cricut, have brought a lawsuit against 2 software companies who used to make software for the Cricut.  YOU CAN NO LONGER GET SOFTWARE FOR THE CRICUT WHICH ALLOWS YOU TO MAKE YOUR OWN DESIGNS!  You can now only use use their cartridges unless you already have the software.

The easiest way of making a stencil using a black and white image like the above (see previous post) is by putting it under a piece of acetate and drawing the outlines with a black permanent pen, making sure there are no areas of detached white (like the nose here). Then cut out the black areas with a craft/Xacto knife and you are good to go...

But, oh noooo, Miss Gadget Girl here has to go the long technical route.  About a year ago I bought myself a Cricut which is used mainly for card making.  However, I saw the potential for making complicated stencils for fabric painting.

So, to be able to use the picture I have here with my Cricut machine, I have to convert it to a vector type image.  Photographs which can be viewed and manipulated in Photoshop Elements are made up of lots of pixels (bitmap) as you see here in this enlarged view:


A vector type image or graphic is made up of lines, points and curves and includes mathematical equations to calculate the shapes.  The advantage of a vector graphic is that you can increase or decrease the size of the graphic without losing any quality whereas you can see above that the more you enlarge a pixelated image the more it loses its smoothness.

To work with vector images you need a completely different software package (the main Photoshop package can deal with vectors but not Photoshop Elements).  So to create vector images for my Cricut, I have 2 software packages, Craft Edge's Sure Cuts A Lot which enables you to use your own graphics with the Cricut and Inkscape which is a wonderful free graphics package.

I open Sure Cuts A Lot (SCAL) and use the trace option to import the image.  This converts the image from a bitmap to a vector.  Once this is done the image can be cut immediately but sometimes, if it is a complex image, it requires a fair bit of editing to make it cut a smoother stencil.  To minimise editing it is sometimes worth printing out the image and smoothing the edges and cleaning it up with a black ink pen and then scanning it back in.

 
Although you can edit these images in SCAL, the editing tools are quite basic and I find them quite frustrating so I now take the image into Inkscape and clean it up there.  I have to say that if you have never used vector graphics before there is a fair bit to learn and if you are not good on the technical side I suggest sticking with the xacto knife!

Here is a close up of the dog's nose showing the vector points which you can move.  When you click on a point you are able to change the curve by manipulating the little 'arms' (see top left of nose).  When the image is first traced there are lots of vector points.  It is worth deleting some points because the cutter will move to each vector point which makes the cutting less smooth if there are many points:


Here is the image in SCAL after it has been cleaned up:

Now I can connect my Cricut to my PC and cut the dog face out.  To make a stencil I cut the image on either acetate, stencil sheets or freezer paper.  Freezer paper can be ironed onto fabric and this makes it easy to fabric paint accurately without paint seeping under the stencil.

The vector images that can be used with the Cricut are SVG images (scalable vector graphics) and there are lots of free SVG images on the internet that you can use with the Cricut (if you have SCAL).  You don't have to make your own if you don't want to.

In the next post I hope to show you the dog face painted onto fabric.

Sunday 24 July 2011

Converting Photographs to Black and White

One of the most useful techniques you can learn in Photoshop Elements is how to convert a picture to black and white (without grey) and use it to make stamps, stencils and templates for thermofax screenprints.

The problem is there are a zillion ways of converting a picture to a black and white image to use for these purposes and the method you use depends on the photograph.  Sometimes a photograph really doesn't have enough contrast to do a good job of conversion and often it is necessary to 'cut-out' the object in the photograph and then change it.

One weekend I took this picture of a lovely little dog at a pub that my friends and I went to.  I struggled to get a close up of the dog and the contrast wasn't good at all but I really wanted to see if I could make a stencil of the dog's face.


So the first thing I did was to crop the picture to show mainly his face.  I then applied an auto contrast and an auto sharpen to try and improve the contrast.


I then tried all the usual simple methods of converting a picture to black and white.  Make sure the foreground colour is set to black and the background colour is set to white.  Then go to Filter > Filter Gallery.  Go to the sketch options and try out the Stamp, Photocopy, Torn Edges and Note Paper options.  Make sure that you fiddle around with the settings on the right-hand side (eg light/dark balance, smoothness, detail etc).

However, none of them gave me the detail I wanted so I went in search of a different method.  I went to the artistic section and chose poster edges.  After playing around with Thickness and Intensity I got more lines and started to see the outline of a decent stencil.


I then converted the picture to black and white by going to Enhance > Convert to Black and White. 


There are still areas of grey so to get rid of these I use the Background eraser tool, set the brush to it's largest and the tolerance level to about 10% and click on areas of grey to remove them.  There are still bits left so I get rid of these using the eraser tool.  Finally I remove areas around the head using the eraser tool and change some of the lines the way I want them.
And now the little dog is ready to turn into a stencil which I will do in the next post...

Friday 22 July 2011

Saville Gardens

A friend of mine took me to a wonderful place called Saville Gardens.  I took my camera along and had a field day.  When I got back this evening I thought I would do some very quick manipulations.  I allowed myself only 10 minutes per picture.  Here are the originals:

Here are the results:


Tuesday 19 July 2011

Sunbury Collage

My intention today was to start sewing my salmon/grey bag for my outfit but realised that I probably needed to do just one more print to add to my existing printed fabric so decided I would wait until I had a batch of fabric printing to do.

So I decided to experiment with the pictures that I took in the gardens of the Sunbury Embroidery Gallery.  I combined a picture of a wall with flowers with a cherab statute that I cut out plus some shapes and music notes.

Here are a sample of the results that I liked the most:


I added a flower to this one and used the luminosity blend mode:

Sunday 17 July 2011

Pulled Out an Ongoing Project..

I couldn't do anymore hand embroidery on my course project until the next assignment so looked around for a project which has been crying out for some hand embroidery.

I started my own style Teesha Moore fabric pillows a while back and add to them when I have a spare hour or so.  I am hoping to eventually make a bag out of them (well, eventually).  I wanted them to have a sort of medieval theme and created the ones below on calico using stencils and thickened procion dyes and some have rubbings with Markal Paintstiks.  I have used machine embroidery on a couple and now I have some with hand embroidery.  Here are a sample:

Immersing Myself in Hand Embroidery

About half an hour away from where I live is The Sunbury Embroidery Gallery.  I have known about it for a while but never visited it so I thought now was the time to go to get inspiration.  The gallery is set in a beautiful walled garden and there is a cafe which serves lunch and teas.


The gallery is free to view and has massive embroidered panels along one wall as well as the insignia of local organisations and companies.  Here are some samples:


Some of the detail was really quite delightful:


I took some lovely pictures of the garden which included cherab statues - I see the potential for a collage here.  You'll have to wait and see.

Saturday 16 July 2011

Thank Goodness for the Open Golf...

I now know why I probably haven't done much hand embroidery up 'til now.  It takes so LONG.  I feel like I have spent hours and hours on my course piece with little to show for it.  I have enjoyed it though - very therapeutic.

When my dear hubby phoned up to ask me what I did all afternoon yesterday, I said 'I watched the British Open Golf while I did some embroidery' and he said 'Oh, fine'.  If I had said 'I watched soap operas all afternoon while I did some embroidery' would I be unfair if I thought he might have said 'haven't you got something better to do'!

So, the piece we are required to do has a very abstract element and I have to say abstract is not really my thing so I can't say I like it but let's see how it looks by the end of the course.  The main thing is that I am getting some practise in and learning new stitches.

Thursday 14 July 2011

The Open Golf started today....

I don't think there are many people out there who do fabric art and are also golfers...are there?  Anyhow I realised that this is the perfect week to do my embroidery because I can sit in front of the telly with both of my specs on (sad, I know, I don't have bifocals but I have a narrow pair of reading glasses which I balance my long distance glasses on and it works perfectly!) and do my sewing at the same time.

So as they say here I am as Happy as Larry watching the golf on telly and doing my running stitch, backstitch....

Just started an Online Beginners Embroidery Class

My online beginners embroidery class with Susan Sorrel started last week.  I finished painting the fabric yesterday and had such fun using bubble wrap that I ended up covering my test fabric with it as well!  I can see why so many fabric artists and journal makers use it - so addictive!


So here is the section of fabric I have chosen to do my embroidery on:


I went shopping this morning to get the the embroidery threads I wanted and the right size hoop.  I'm very lucky because I have a little quilt shop called Needle and Thread just 10 minutes away from where I live.

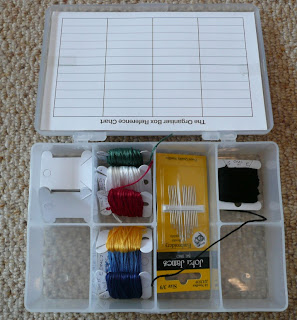
I am sure that my threads would all get tangled up so I decided to get organised from day one.  I put my threads on little cards with the details written on them and put them all in a little box.  Wonder if I'll keep it this way but I do like it.

Wednesday 13 July 2011

Yikes! It's Wednesday Already

I had great intentions the last 2 days to get lots of arty stuff done and in the end life has got in the way as it so often does.  So last night I gave myself permission to use the couple of hours I had with just having a play.  I have to get out of the mindset that I need a whole day to create.

SO, I took a picture that was given to me by a friend and decided to see what I could do with it using the Shape Tool in Photoshop Elements.  This is the original picture:


To make it into an abstract background, I changed the Hue/Saturation and then applied the Cutout Filter:


I decided that I wanted to create shapes which could be appliqued onto some fabric so this is what I came up with.  There are loads of free shapes to download on the internet - unfortunately you cannot create your own shapes in Photoshop Elements; only in the full version of Photoshop.

The cup shapes I used were a free download from the internet and I didn't record who the creator was so I am sorry that I am unable to give them the credit they deserve:

Sunday 10 July 2011

A Morning of Printing

Printing on fabric using an inkjet printer is not for the faint hearted but I LOVE making my own material and it is worth all the effort as far as I am concerned.

I bought a continuous inking system with quality ink which makes the ink a lot cheaper but it requires some setting up and if something goes wrong you need to be prepared to surf the net to get answers.  I now have a good idea of most of the foibles!

I like to leave a whole day for printing because once a printer is working well and the ink is flowing, it is worth doing as much as possible.  One things for sure, do all the printing you want for one article because tomorrow the printer might be printing a different shade!

I start off by making sure all my ink tanks are full.  In your case, make sure that the cartridges are full.  There is nothing worse than the printer failing half way through a print or print run.

I redid my paper samples and a small fabric sample to check that the ink was coming through properly.  It was printing well so I decided not to do a nozzle check.  Big mistake.  Ran my first print and the ink flow changed after a couple of lines.

Actually a nozzle check is not always a perfect indication of ink flow.  I have printed a perfect colour test print and it suddenly goes belly up. So I did a couple of print head cleans and after that all went well.

A major tip when you are about to put your fabric through the printer, get a piece of sticky tape and dab the sticky part of the tape over the fabric to pick up any bits of lint or cotton.  Believe me, there is nothing more irritating than taking out a perfect print and a small piece of thread comes away leaving a white stripe!

I have to say, too, that putting a strip of masking tape along the front edge definitely cuts down the number of times the material doesn't go through.

Here are some of the samples:

Friday 8 July 2011

Fabric Preparation for Printing

I find preparing fabric for printing a very boring process so I try and get lots of pieces of material done in one go.  I am lucky to have an A3 pigment printer (rather than a dye printer) which is better for printing on fabric.  This means that I can print on much larger pieces of fabric.  However, the bag I am making is not going to be very big so I am sticking to A4 size pieces of fabric.

So these are the steps I go through:
  1. Cut the white fabric down to sheets just larger than A4.
  2. Cut pieces of freezer paper* down to just larger than A4.
  3. I iron each bit of fabric first.
  4. Then I iron the freezer paper to the back of the white fabric.  I iron on both sides with the fabric side last to make sure that there are no 'bubbles'.
It is very important that the side that goes through the printer has been very well ironed so that it is firmly attached to the fabric.  When I finally use the fabric for printing, I use the rotary cutter to cut along the edge that goes through the printer to make sure that it is 'sharp'.  I also recheck that the freezer paper is firmly attached.

Always prepare at least double the amount of the material you need.  Once I get started with printing, I like to do a lot and you can never legislate for what might happen half way through a print!

* edit:  for those of you who don't know what freezer paper is, it is paper originating from the US which has a shiny side which temporarily adheres to fabric when you iron it onto the fabric.  It is available here in the UK at quilt shops, some hobby craft stores and some sewing/fabric shops.

Thursday 7 July 2011

Fabric Printing

Time to do some more fabric printing.  I have an outfit which I love and which needs a small bag to complement it so I have set about designing some fabric for it.

The outfit consist of grey jeans, a grey t-shirt, a light salmon jersey and a beautiful grey and salmon scarf:
The most difficult part of this is trying to match the colours.  There are 2 ways I do this:  either by scanning my outfit and trying to match the colours from this or by using a colour swatch.

I bought my colour swatch quite recently and already feel that I am getting a much better match.  It only came out in March, I see, but already I find it indispensible (both UK and US Amazons have it).  The back of the cards show the CMYK, RGB and Hex colour numbers.  These are the settings you can change in Photoshop Elements to get the exact colour on the card. However, don't think you printer will necessarily print this colour!  This requires colour calibration which can be a drawn out or even an expensive endeavour.  I will one day spend more time getting this right but happy for now just to print out swatches and get the best match.


When I compared my jersey with the swatch I couldn't believe that the colours that matched were on the Orange and Yellow-Orange colour cards and in fact the colour I chose was on the Yellow-Orange card.  I tend to go for a colour which is lighter than the original because the swatch colours on the card are small and become more intense when the area is bigger, secondly, they often print out darker on fabric and lastly, I find a slightly lighter colour often matches better.

I first print out a colour swatch on paper and once I have it right I print it out on fabric because the colours can still change.  I then write down the colour combinations and the printer settings on the print-outs.  Oh yes, and I also write down on the fabric, the fabric I used - in this case I used Cotton Sateen Arian White which is my favourite at the moment (I bought it online from Whaleys in the UK). If you don't print out the fabric on the same day, it is worth reprinting samples just before you do the print run - so much depends on the printer!  I have decided on using 2 different fabrics - one with dots and one with stripes.  Here is an example of my stripe print-out:

Friday 1 July 2011

Continuing on the Theme of Scanning....

In Photoshop Elements you can create patterns and I am always looking for new patterns to add.  I was doodling on a piece of paper today while I was waiting for lunch to cook and decided I quite liked the squiggly doodle in the middle so decided to make a pattern of it.

Here is the completed pattern.


Here is how I did it:
  • Open the scanned image and select the crop tool and crop the image to the size of the doodle:

  • Then select Enhance > Auto Sharpen just to make the black squiggles a bit darker.
  • Next, remove the background by selecting the Background Eraser Tool, making the brush as big as you can and then clicking on the white area.  You must set the limits to Discontiguous.
  • Now select Edit > Define Pattern and give the pattern a name.
  • To use the pattern, open a new document and create a new layer 
  • Then go to Edit > Fill Layer.  Set the use to pattern and select the pattern you have saved.
  • Remember to save your pattern by going to Edit > Preset Manager. Select pattern as preset type, select the pattern/s you want to save and then save them.
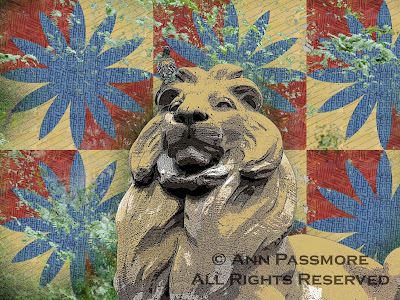
Here's a picture my husband took in New York which I did some while back using doodles I scanned in.  Not sure it has any use but it was good practise: