This week really has been a week of flowers and the city. I was back in Central Hong Kong again and wondering about today's picture when I passed a shop opening it's doors for the first time today (shops change in Hong Kong like people change their underwear!). When a new shop opens there are always a bunch of massive flower arrangements outside the door from various organisations congratulating the shop on it's new venture. I smile because hey, photo opportunity.
So today is yet another flower. The decision is then, do I photograph the flower with Hipstamatic and leave it as it is or do I pimp it up in one of the fabulous apps I have on my iPhone?
Well, I can't resist can I?! So I thought I would take you through the process I went through. Here is the final result:
So I started off with the original flower that I took using Hipstamatic (Helga Viking lens with Kodot XGrizzed Film):
I decide to take it into Stackables to grunge it up a bit. I touch the star formulas button and the first one is Happiness and I rather like the metallic quality that it produces and wonder what this would look like blended back with the original.
So I take the original into the iColorama app and then choose Effects>Blend and then for Photo choose the Stackables version above to blend with the original. Going through the presets Negation looks interesting. I turn down the Feature opacity to about 70% and apply it. Then I decide to vamp it up slightly be going to Adjust>Vibrance and upping the Vibrance slightly. I save it and this is the result:
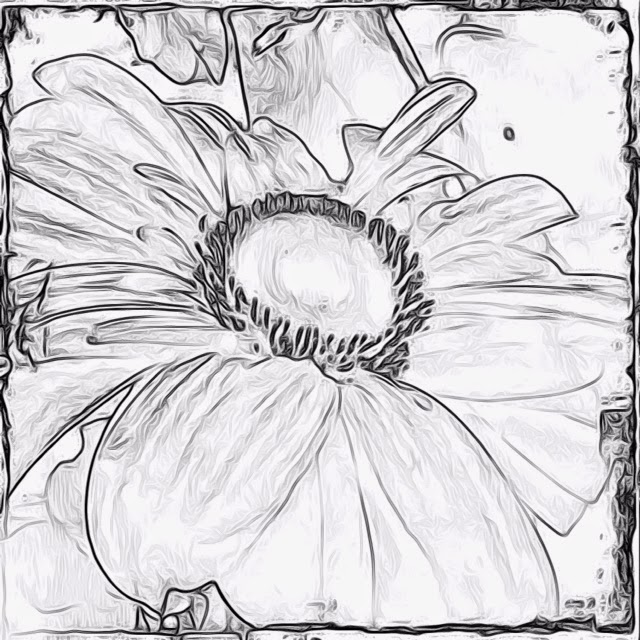
I want to accentuate the flower more so I take this version and choose Style>Edges>5 with maximum size to get a black and white outline. I apply this and then go to Style>Coherence>5 to give it a smoother look. The final result is this:
Now to blend the last two together. So in iColorama I bring in the colour version, choose Effects>Blend and then using the preset Multiply, I blend them together to get this:
It's a little bit dark so I decide to lighten it just a tad in Snapseed using the Tune Up option. Here is the result:
But when I compare it with the original I see that the lovely bright yellow stamens are dark so I have a brainwave. I take the original into Superimpose as a background, I bring in the above version as a foreground and I zoom in really close and mask out the black stamens so that the yellow shows through and Voila, I have what I want which is the first picture.
Here is a picture of all the large flower arrangements outside the store:


No comments:
Post a Comment